The main goal of the following article is to demonstrate some good practices for creating nested navigation structure. The article does not aim to be a strict guide, but will help you to understand how you could create complex navigation structures while using forward (e.g., frames or outlets) & lateral navigation (e.g., drawers, tabs, bottom navigation, etc.). In each of the article sections, you can find visual guides along with corresponding Playground demos.
Simple Rule
There is one simple rule when it comes to nesting navigation widgets.
Important: When nesting an outlet or a tabs/bottom-navigation, they should never have direct siblings in the markup. Instead, wrap them in a layout and nest this layout.
If these components have siblings, they will span over them in most scenarios. The reason for this is on iOS the navigation controllers always take all the space provided by their parent regardless of their own layout parameters.
You can check out how this is done in the examples below.
Nesting Simple Forward Navigation
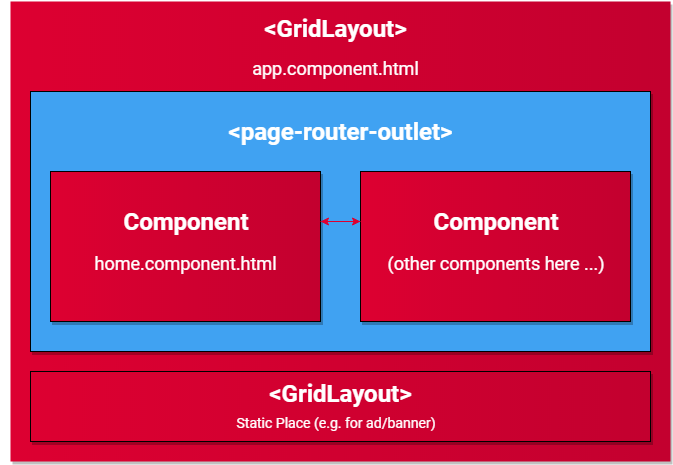
Nesting simple forward navigation: A
page-router-outlet (mentioned in this article also
as P-R-O) in a layout, for example, to show an
advertisement banner on the top/bottom (static content).
GridLayout
    > P-R-O (forward navigation)
        >> Components
    > Static Content
Code: Playground Demo Angular
Nesting Simple Lateral Navigation
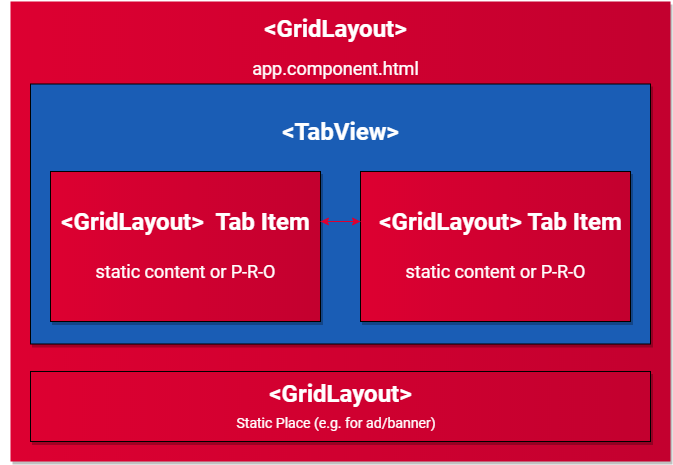
Nesting simple lateral navigation: a TabView in a layout, for example, to show an advertisement banner on the top/bottom.
GridLayout
    > TabView (lateral navigation)
        >> Layouts | P-R-Os
    > Static Content
Nesting Forward in Forward Navigation
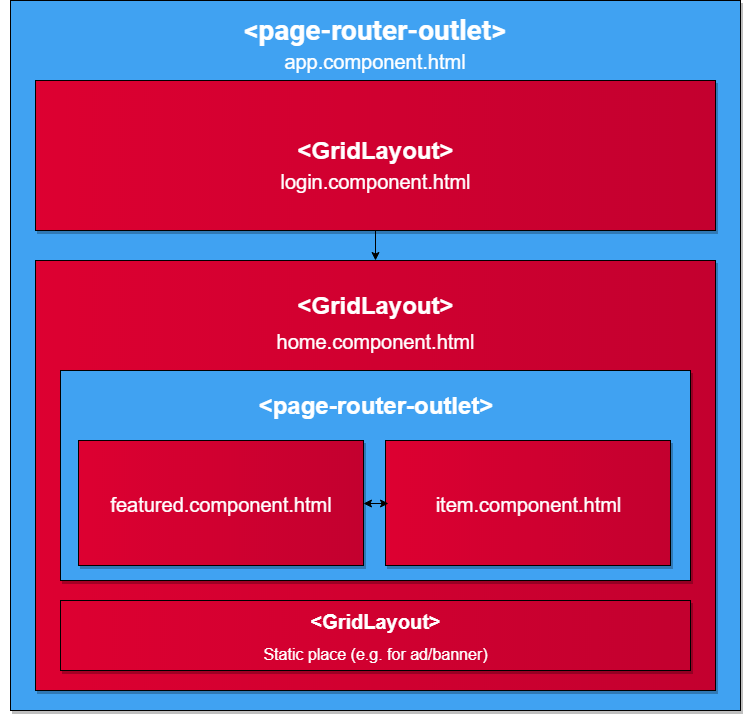
Nesting a page router outlet inside another page router outlet, for example, to create a secondary navigation level.
Note: Each page router outlet comes with its own
ActionBarby default. It's typical that you want to keep oneActionBaron top of the screen when nesting outlets. Set theactionBarVisibilityproperty of the page router outlet toneverto hide theActionBarwhere needed.P-R-O (root forward navigation) > login.component > home.component >> P-R-O (secondary forward navigation) >>> featured.component >>> item.component
Nesting Lateral in Forward Navigation
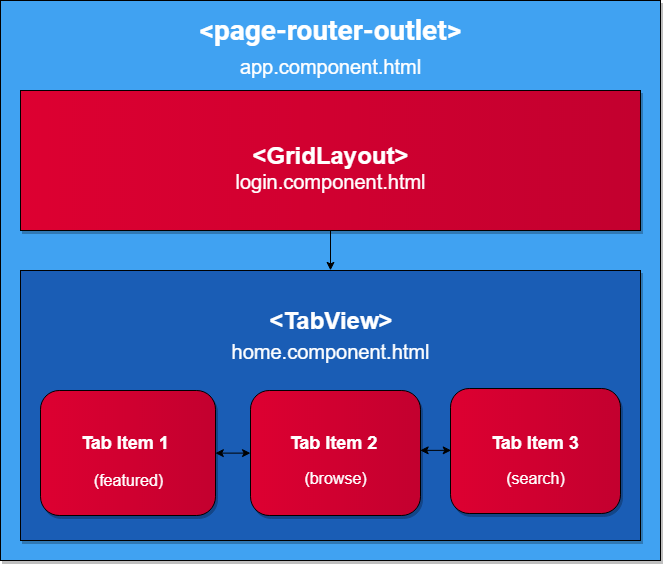
Nesting a BottomNavigation (lateral navigation) inside a page router outlet. For example in a Login component with forward navigation to a component with a nested BottomNavigation.
P-R-O (forward navigation)
    > login.component
    > home.component
        >> BottomNavigation (lateral navigation)
Nesting Forward in Lateral Navigation

Example of a root TabView with multiple nested page router outlets. Each outlet in each tab should be navigated through its unique outlet name. Notice that in the routing module, you should set a default route for each outlet used within the lateral navigation.
// default route example
{ path: "", redirectTo: "/(featured:featured//browse:browse//search:search)", pathMatch: "full" },
In the above route, we are setting the feature outlet to default to featured component, the browse outlet to default to browse component, and the search outlet to default to search component.
TabView (lateral navigation)
    > P-R-O (outlet name: "featured")
    > P-R-O (outlet name: "browse")
    > P-R-O (outlet name: "search")
Nesting Lateral in Lateral
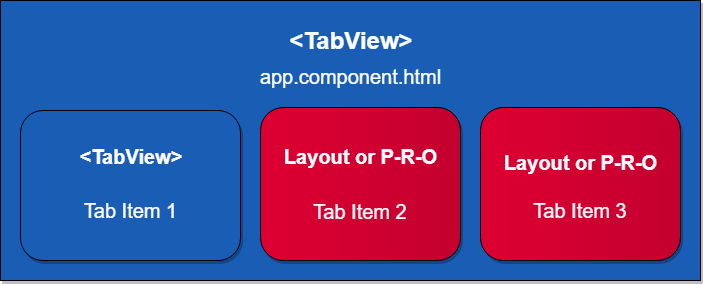
TabView (lateral navigation)
    tabItem > TabView (lateral navigation)
                >> another content (e.g. layout or P-R-O)
    tabItem > another content (e.g. layout or P-R-O)
    tabItem > another content (e.g. layout or P-R-O)