Getting Started
Before you continue, make sure you have reviewed the Prerequisites and have executed the steps to setup your environment for testing with Appium.
The following steps will guide you through the process of setting up your project for e2e testing and running your first test.
Project Setup
- Add the nativescript-dev-appium plugin as a devDependency to your project:
$ npm install -D nativescript-dev-appium
After completion of the installation, the plugin should have added an
e2efolder containing predefined configs and samples.
Folder Structure
After you've setup your project for E2E testing, it should have a structure similar to:
    my-app
    ├── app
    ├── e2e
        ├── config
            ├── appium.capabilities.json
            ├── mocha.opts
        ├── sample.e2e-spec.ts
        ├── setup.ts
        ├── tsconfig.json
    ├── ...
    ├── package.json
    ├── tsconfig.json
To avoid any incompatibilities between the source of e2e tests (ES6) and the source of the application (ES5), we recommend to exclude the e2e folder from the application's tsconfig.json file:
exclude": [ "e2e" ].
Here is more info about the E2E test specific files and configurations:
| File | Purpose |
|---|---|
| config/appium.capabilities.json | Contains predefined configurations for test execution. |
| config/mocha.opts | A default mocha configuration file. |
| sample.e2e-spec.ts | Contains a predefined ready-to-execute sample tests of the default hello-world-ts template. |
| setup.ts |
Defines the before and
after test execution hooks responsible to
start and stop the
Appium server.
|
| tsconfig.json |
TypeScript compiler configuration file for the
e2e tests.
|
Generated tests are standard Mocha tests.
Note - in case you want to execute image comparison while testing there are two more important folders to have in mind:
e2e/reports- it is created during test execution and stores the actual images from comparisone2e/resources- this folder aims to store the expected images for comparison
Running Your First Test
Before running the tests you will have to build your app for the platform you want to run the tests for. In the example below I'll build my app for both platforms. Navigate to your app main folder and run the following commands to build your app for iOS and Android:
$ tns build android
$ tns build ios
The command that will run the tests should specify the targeted
capabilities configuration using the runType option
as shown below. This way a capabilities configuration will be
selected from the
capabilities
configuration file.
Appium capabilities are a JSON object describing how to run your test - what plarform to use, which version, where your app is located, etc. Read more about capabilities in the official Appium documentation.
To understand more about how to create custom capabilities, you can refer to the Customization section in this documentation.
$ npm run e2e -- --runType=<capability-name>
where <capability-name> is defined in
<your-app-folder>/e2e/config/appium.capabilities.json. You can choose any of the predefined ones or
create new ones
before running the tests. This will asure you that you are
executing the tests against the platform and version you want
to.
For Android, make sure that the deviceName and
avd match the name of an existing AVD. We recommend
using underscores as separators in the name i.e.
Pixel_API_28.
For iOS, you also need to make sure that the
deviceName and platformVersion are
configured in the Simulator app.
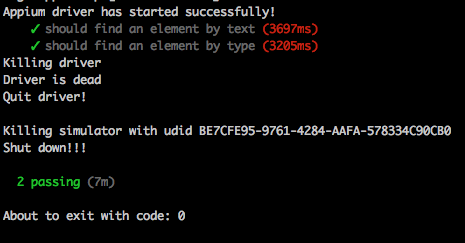
Here is the result of a successful run on iOS:

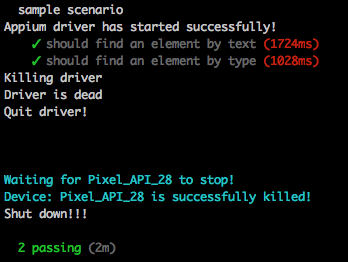
... and on Android:

Summary
Let's summarize the steps we executed to create a project, set it up for e2e testing and run a sample test:
// Create an app and follow the steps and create a Hello World TypeScript app
$ tns create appium-demo

// Navigate to the app folder
$ cd appium-demo

// Install the nativescript-dev-appium plugin as a dev dependency and configure the project for e2e testing
$ npm install -D nativescript-dev-appium

// Build for iOS and/or Android
$ tns build ios
$ tns build android

// Run the sample tests for Android and/or iOS
// Make sure the used capabilities are defined in `<your-app-folder>/e2e/config/appium.capabilities.json`
$ npm run e2e -- --runType=android25
$ npm run e2e -- --runType=sim.iPhone8.iOS110
What's Next?
Now that you have a basic idea how to setup your project for e2e testing you're ready to deep dive into more advanced topics. Take a look at the nativescript-dev-appium features available including how to perform different gestures, actions, find elements, etc. in your tests.